DC23 here just sharing a really old tutorial from my blog. This is basic scribing of panel lines guys... hope this helps! :)
I am not good with scribing panel lines...but I just want to share how I scribe panel lines step by step. I decided to scribe some of the major parts of the Acguy coz the surface is too round for pla plating...well, it can be done...but it's rather difficult than scribing lines along the surface. After taking pics of the Acguy, I realized that I have to add a few more panel lines on the upper arm and forearms of the kit...I will also need to try to scribe on those round shoulders and hip armors...those are tooooo round for pla plates but may also be too round for panel line scribing...will try later. I also added a hole on the chest part to expose the cockpit...will cover this with clear plaplate after painting. Anyways here are some pics...
I am not good with scribing panel lines...but I just want to share how I scribe panel lines step by step. I decided to scribe some of the major parts of the Acguy coz the surface is too round for pla plating...well, it can be done...but it's rather difficult than scribing lines along the surface. After taking pics of the Acguy, I realized that I have to add a few more panel lines on the upper arm and forearms of the kit...I will also need to try to scribe on those round shoulders and hip armors...those are tooooo round for pla plates but may also be too round for panel line scribing...will try later. I also added a hole on the chest part to expose the cockpit...will cover this with clear plaplate after painting. Anyways here are some pics...
FIRST,
draw your desired pattern, I keep them simple coz I am not good at it
and I'll be doing pla plating with most of the parts after anyways...
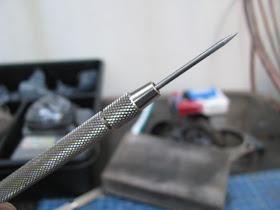
SECOND, using a Hasegawa needle point scriber...I pierce the corners...
THIRD, I use an eraser template ( thin metal ) to guide me from corner to corner...
FOURTH, I scribe with the Hasegawa needle point scriber and run through it with very light strokes...
FIFTH, I run my Tamiya scriber twice on the groove with light stroke...
SIXTH, I sand the piece with 400 grit sandpaper and will sand it before pla plating with 1200 grit sandpaper...
Tadah,
my technique is faster than tapes and other methods that I know....did
all the parts in the pic below in a couple of hours only. hihi
Now
here are some pics of the progress of my MG Acguy, will add a few more
panel lines on a few parts, then do pla plating madness and clean up the
holes...
BTW, I also drilled a hole in the chest part to compliment the collar armor and also sawed the stomach armor into three parts.
UPDATE: 12-20-09 : small update on the holes...
Hello
guys, I cleaned up the holes with an art knife yesterday...actually I
did this in the office around 3 pm to 7 pm...I was only on duty until 4
pm and while I was waiting for our Christmas party at around 8 pm, I did
some much needed cleaning up of the holes...the only uncleaned part was
the armors at the head. All of the parts will be further polished with
sandpaper and some filing, but it is slowly forming up. Anyways here are
some pics...


Thx for the tutorial. Much easier then taping, I agree. Do you have pics of the finished Acguy?
ReplyDeletehttp://dc23-mecharts.blogspot.com/2010/01/mg-acguy-ver-dc23.html
ReplyDeleteAbove is the link of the gallery sir. :)
Great guide! I've been scribing with dymo tape and your method seems a lot faster. Where can I get one of those eraser templates? Also, would you happen to know how to achieve the notches/wider sections along the scribed lines in this Nu's head?
ReplyDeletehttp://blog-imgs-54-origin.fc2.com/s/h/u/shunneige/201303181626539da.jpg
TIA!
how u get the white line in between lines?
ReplyDelete